I love art!
Unfortunately I don’t have an eye for it and my tastes are pretty varied. I also don’t have one of those houses that would display art beautifully. You know big open rooms, long empty walls.
Instead I choose to cover my walls with photos of the people I love and memories I want to enjoy over and over. This option can get crowded and costly depending on how big and where you purchase frames. So I’ve been on the lookout for a way to get more photo/memory bang for my buck.
That’s when I came across an Instagram frame on everyone’s favorite website…Pinterest. This would allow me to display loved ones and memories and rotate them on a regular basis for a fraction of the cost. After looking at several different styles I decided to blend my favorite pins together to create something all my own. Today I’m going to take you on a step by step tutorial of how to create your own Instagram frame to show off your own memories.

Materials:
Frame Sand Paper
Paint Small Screw Eyes
Cardboard (optional) Material (optional)
Tiny Clothes Pins String
Tools:
Measuring Tape Power Drill
Scissors Hot Glue Gun
Staple Gun
Step 1: Choose Your Frame
I had this poster frame sitting in my garage waiting to go to the dump for almost 2 years now when I realized that it would be perfect for this project. I’ve seen people use big frames, small frames, old window frames and even and old screen door.

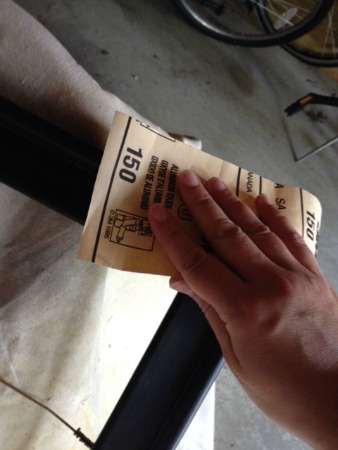
Step 2: Sand the Frame
No matter what your frame is made of you are going to want to rough it up a bit with some sand paper to make sure the paint adheres to it a little better.
Step 3: Paint
Choose your color, get creative. I chose this plumberry color to add some pop to my living room (and match my DIY coat hangers on the other side of my entryway).

Step 4: Measure Your Lines
Lay your frame out on the floor along with your pictures. This is assuming you have the photos you want to display (or at least a few) on hand. I ordered 4 inch photos (from my Instagram account) from the website Persnickity Prints. I laid them all out to see how many string lines I could have. Then, using a measuring tape, mark off the number of lines equal distance apart (I was able to have 6)

Step 5:
Get out your drill and drill a tiny beginner hole into each mark you made. Once you’ve got a hole started you can now screw in your screw eyes. Continue all the way down your frame.
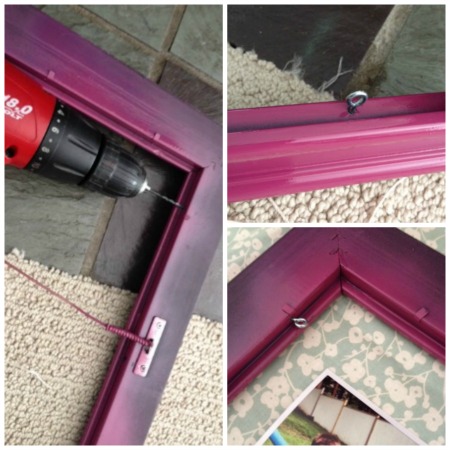
Step 6 (optional):
This next step is optional. You can either leave the back of your frame open, or add some fabric to it to give it some additional color or pattern. I chose to add the fabric.
You’re going to want some cardboard, an old packing box will do as long as it’s big enough to cover the entire back of your frame. I had a very large poster frame so I snagged some cardboard from in between boxes at Costco (they just let me have it). Cut it down to size.
Now cut your fabric to match the size of your cardboard piece. Easy peasy, hot glue that fabric to the cardboard. Just make sure it’s smooth and no wrinkles.
Once the fabric and cardboard have been glued together, you’re ready to staple that backing to your frame. Get out your trusty staple gun and go to town. It’s possible that hot glue would hold it together as well but I didn’t want to take any chances.

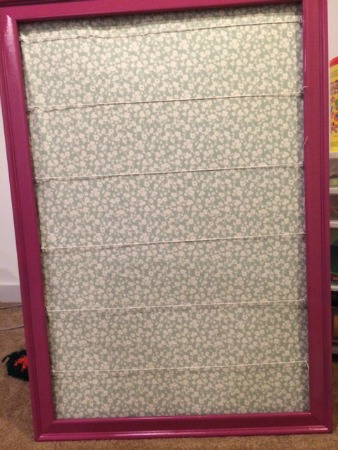
Step 7:
Now you’re ready to create your string lines. I purchased a simple string from Michael’s in the jewelry making section, but you could use anything you wanted really: twine, ribbon, etc. Whatever your creative heart desires!
Tie string to screw eyes and make sure the line is taught. You don’t want to have saggy pictures.
Step 8:
All that’s left is to add your pictures and you’re done. I bought tiny clothes pins (once again from Michael’s), which you can get in a variety of colors and sizes, but you could also use paper clips as well.


